X POS uses a shift-based workflow to track all transactions, cash movements, and financial reconciliation during a working session. Every POS session begins with opening a shift and ends with closing it.
Opening a Shift
When you log in and no shift is currently open, the Opening Shift Dialog automatically appears as a full-screen overlay.
Opening Shift Dialog
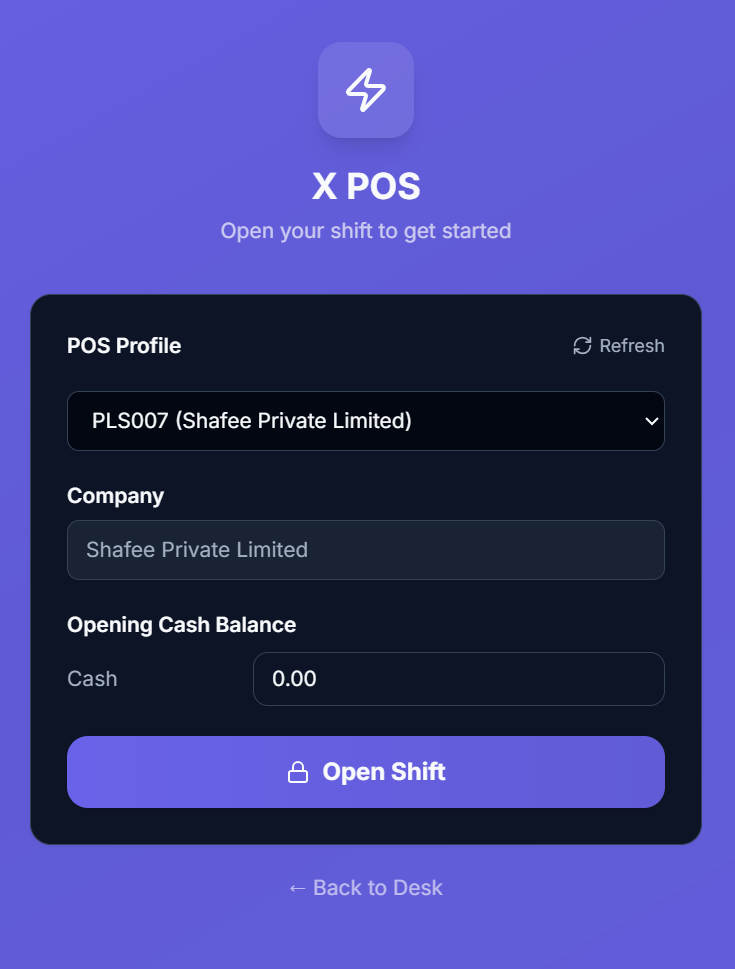
Step 1: Select POS Profile
- Choose your POS Profile from the dropdown
- If only one profile is available, it's auto-selected
- The company name is automatically populated based on the selected profile
Step 2: Enter Opening Balances
For each payment method configured in the profile (e.g., Cash, Card), enter the opening balance:
- Cash — Enter the physical cash amount in the register drawer
- Card / Bank — Typically 0 for non-cash methods
- Use the numeric input with precision for accurate amounts
Step 3: Open the Shift
Click "Open Shift" to create the opening shift record. This:
- Creates an XPOS Opening Shift document in ERPNext
- Links it to your POS Profile and Company
- Records all opening payment balances
- Unlocks the POS interface for transactions
Re-Opening After Connection
In Electron mode, if the system detects a sync completion, the opening data is automatically refreshed to ensure accuracy.
Back to Desk (Web Mode)
A "Back to Desk" link is available in web mode to return to the ERPNext desk without opening a shift. This link is hidden in Electron mode where the POS is the primary interface.
During the Shift
While a shift is open, all activities are tracked against it:
- Sales Invoices — All transactions reference the opening shift
- Cash Expenses — Cash withdrawn from the register
- Cash Deposits/Bank Drops — Cash deposited to the bank
- Cash Movements — All cash in/out tracked by type and amount
Cash Movements
Cash movements track cash flowing in and out of the register during a shift. There are two types:
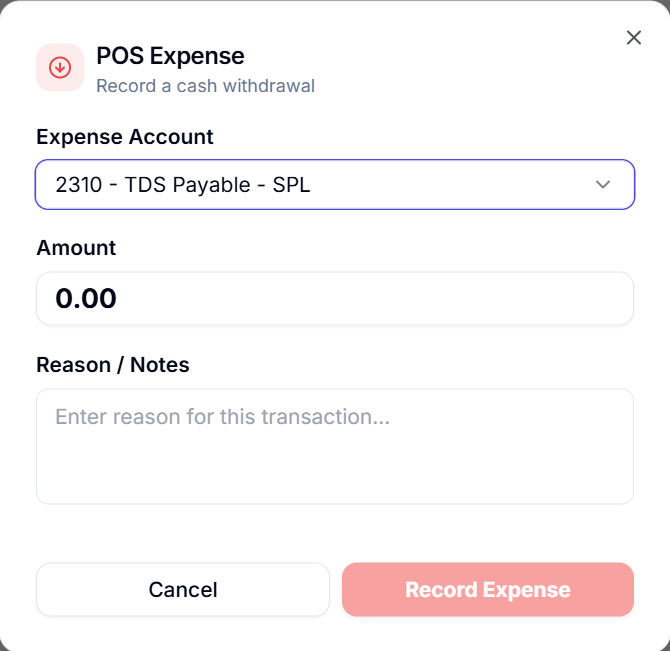
Cash Expense (Cash Out)
Record cash taken out of the register for operational expenses.
How to record an expense:
- Click the Expense button or press Ctrl + E
- The Cash Movement Dialog opens in Expense mode (red styling)
- Select the Expense Account from the dropdown:
- Available accounts are configured in the POS Profile's "Allowed Expense Accounts" table
- If a Default POS Expense Account is set, it's pre-selected
- Enter the Amount (numeric input, 2 decimal precision)
- Enter a Reason/Notes (required if "Require Cash Movement Remarks" is enabled)
- Click "Record" (red button)
- The expense is created as an XPOS Cash Movement document
- Recent movements for this shift are displayed below the form
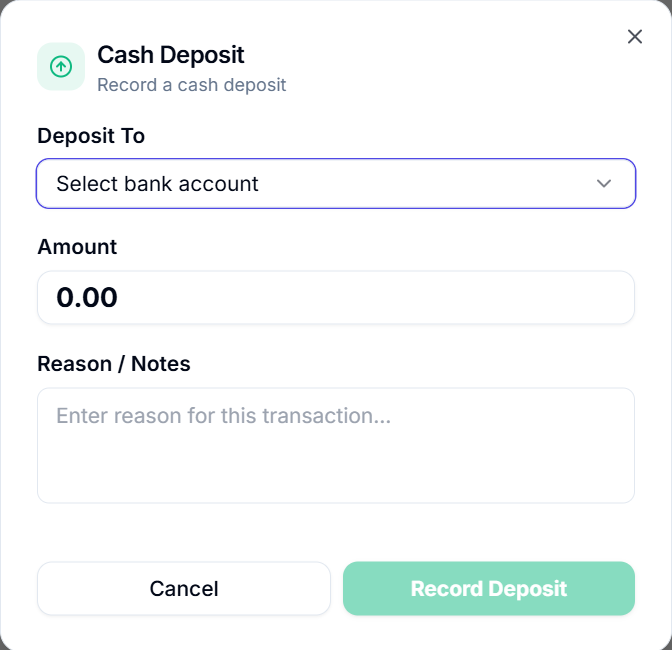
Cash Deposit / Bank Drop (Cash In)
Record cash being deposited to a bank account or safe.
How to record a deposit:
- Click the Deposit button or press Ctrl + Shift + D
- The Cash Movement Dialog opens in Deposit mode (green styling)
- Select the Deposit To account from the dropdown:
- Available accounts are configured in the POS Profile's "Allowed Source Accounts" table
- If a Back Office Cash Account is set, it's pre-selected
- Enter the Amount
- Enter a Reason/Notes (optional or required based on settings)
- Click "Record" (green button)
Recent Movements Display
The Cash Movement Dialog shows the last 5-10 movements for the current shift below the form:
- Movement type (Expense/Deposit) with colored icon
- Amount
- Reason/notes
- Timestamp
Cash Movement Permissions
| Setting | Description |
|---|---|
| Enable Cash Movement | Master switch for cash movement features |
| Allow POS Expense | Enable expense recording |
| Allow Cash Deposit | Enable deposit recording |
| Require Cash Movement Remarks | Require notes for every movement |
| Allow Cancel Submitted Cash Movement | Allow cancellation of submitted movements |
| Allow Delete Cancelled Cash Movement | Allow permanent deletion of cancelled movements |
| Allow Source Account Override | Allow changing the source account |
| Cash Movement Max Amount | Maximum amount per movement |
Expenses View
The Expenses view provides a dedicated page for viewing and managing all cash expenses across the shift.
Accessing Expenses
- Click Expenses in the Sidebar
- Press Alt+6
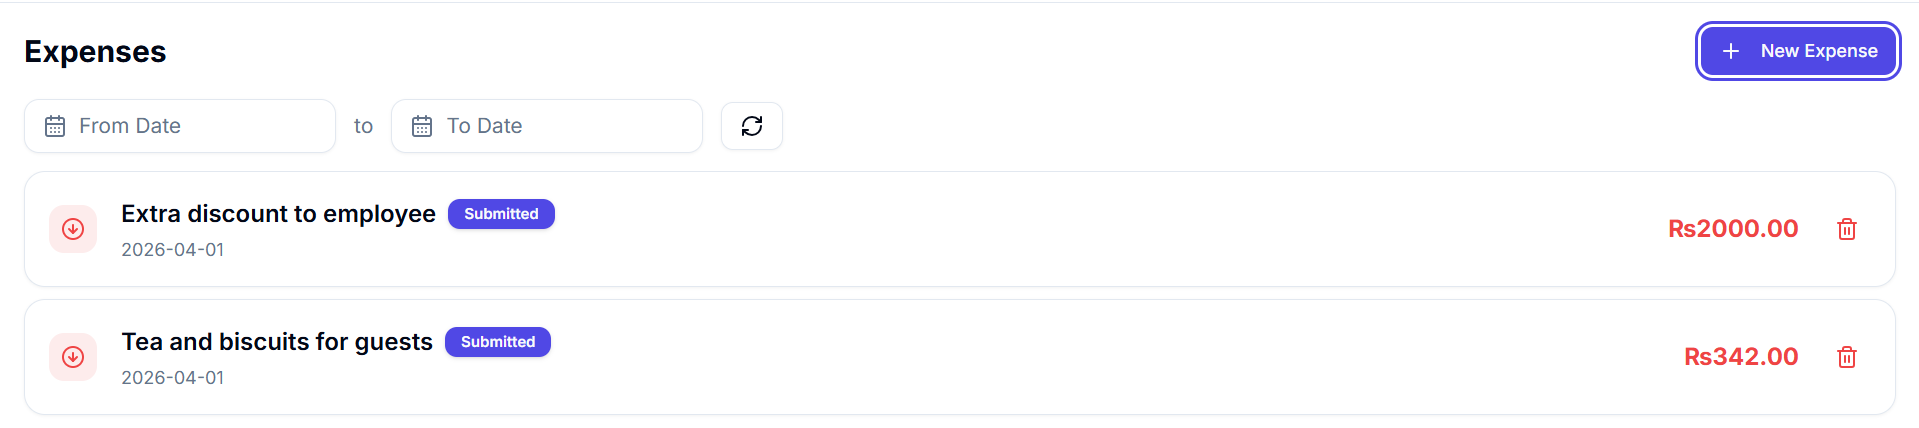
Expense Card Display
Each expense card shows:
- Red Cash-Out Icon — Visual indicator
- Expense Account — Account name
- Status Badge — Draft (gray), Submitted (green), or Cancelled (red)
- Date — When the expense was recorded
- Amount — In red text
- Delete Button — Available for draft or deletable expenses
Adding New Expenses
Click "+ Add Expense" to open the expense form:
- Select the expense account
- Enter the amount
- Add notes (if required)
- Submit the expense
Filtering
- Date Range — From/To date filters
- Refresh — Manual refresh button
- Pagination — Page size and navigation
Bank Drops View
The Bank Drops view is the counterpart to Expenses, focused on cash deposits.
Accessing Bank Drops
- Click Bank Drops in the Sidebar
- Press Alt+7

Bank Drop Card Display
Each deposit card shows:
- Green Cash-In Icon — Visual indicator
- Target Bank Account — Where cash was deposited
- Status Badge — Draft, Submitted, or Cancelled
- Date — When the deposit was made
- Amount — In green (emerald) text
- Delete Button — Available for draft or deletable deposits
Adding Bank Drops
Click "+ New Bank Drop" to open the deposit form:
- Select the deposit account
- Enter the amount
- Add notes
- Submit
Filtering
Same filtering options as Expenses: date range, refresh, pagination.
Closing a Shift
At the end of a working session, close the shift to reconcile cash and create the closing record.
How to Close a Shift
- Click the Close Shift button in the Navbar, or press Ctrl + Shift + O
- The Closing Shift Dialog opens
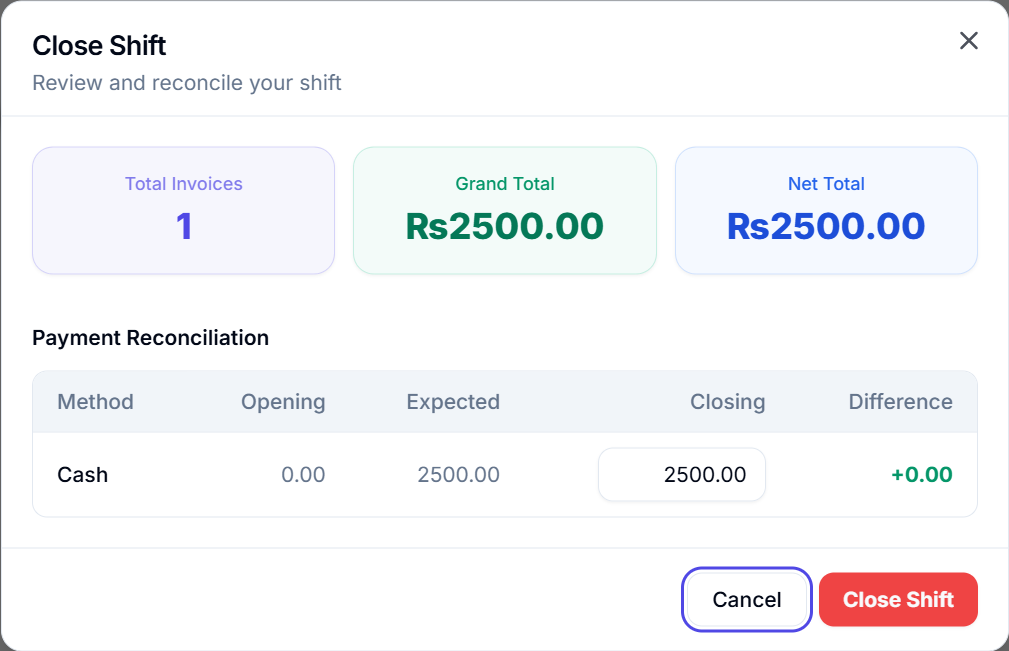
Closing Dialog Layout
Summary Cards
At the top, three summary cards show aggregate data for the shift:
| Card | Description |
|---|---|
| Total Invoices | Number of invoices in this shift |
| Grand Total | Total sales amount |
| Net Total | Net total (before taxes) |
Tax Summary
If transactions included taxes, a tax summary section shows:
- Each tax line with description and total amount
- Total taxes collected during the shift
Payment Reconciliation Table
This is the core of the closing process — a table where you reconcile each payment method:
| Column | Description |
|---|---|
| Payment Method | Cash, Card, Bank Transfer, etc. |
| Opening Amount | The opening balance entered when the shift started |
| Expected Amount | System-calculated expected closing amount (opening + received - expenses - deposits) |
| Closing Amount | Editable input — Enter the actual counted amount |
| Difference | Auto-calculated: Closing - Expected |
The Difference column is color-coded:
- 🟢 Green (positive) — Cash over (more than expected)
- 🔴 Red (negative) — Cash short (less than expected)
- Zero — Perfect reconciliation
Reconciliation Process
- For each payment method, count the actual cash/receipts
- Enter the Closing Amount in the editable field
- Review the Difference column
- If differences exist, investigate or note them
- Click "Close Shift"
After Closing
Once the shift is closed:
- An XPOS Closing Shift document is created in ERPNext
- The dialog switches to the "post-close" state showing:
- Print Summary button — Opens the closing shift report for printing
- Done button — Closes the dialog
- The POS interface returns to the Opening Shift state for the next session
Print Shift Summary
After closing, click "Print Summary" to open the closing shift document in the print view. This provides a complete audit trail including:
- Opening balances
- Sales summary
- Cash movements
- Closing balances
- Differences/discrepancies
The "Hide Closing Shift" Setting
If "Hide Closing Shift" is enabled in POS Profile, the Close Shift button is hidden from the Navbar. This is useful for always-on POS terminals that don't use shift-based workflows.