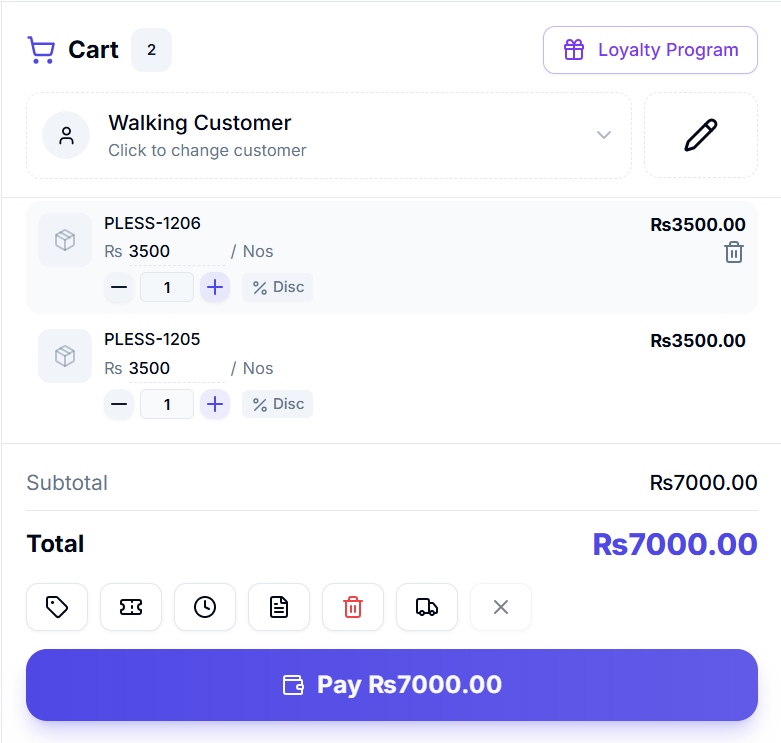
The shopping cart occupies the right panel of the POS interface. It displays the selected customer, line items with quantities and prices, applied discounts, taxes, and the grand total.
Customer Selection
At the top of the cart, the customer section shows the currently selected customer or prompts you to select one.
Selecting a Customer
- Click the customer area at the top of the cart, or press F6
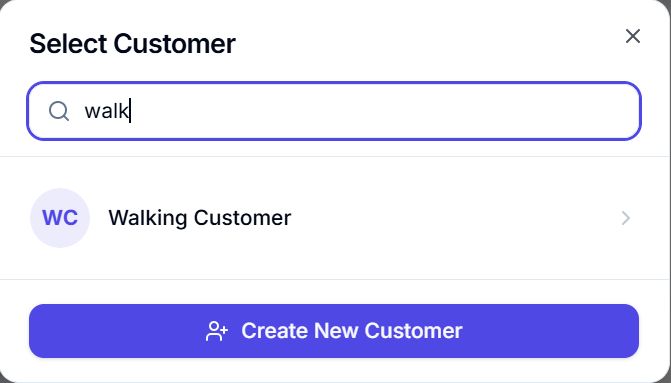
- The Customer Selection Dialog opens with:
- Search Input — Type to search by customer name, phone number, or email (300ms debounce)
- Customer List — Scrollable results showing avatar, name, phone, and email
- Keyboard Navigation — Use ↑/↓ arrows to navigate, Enter to select
- Create New button — Switch to the new customer creation form
- Click a customer to select them
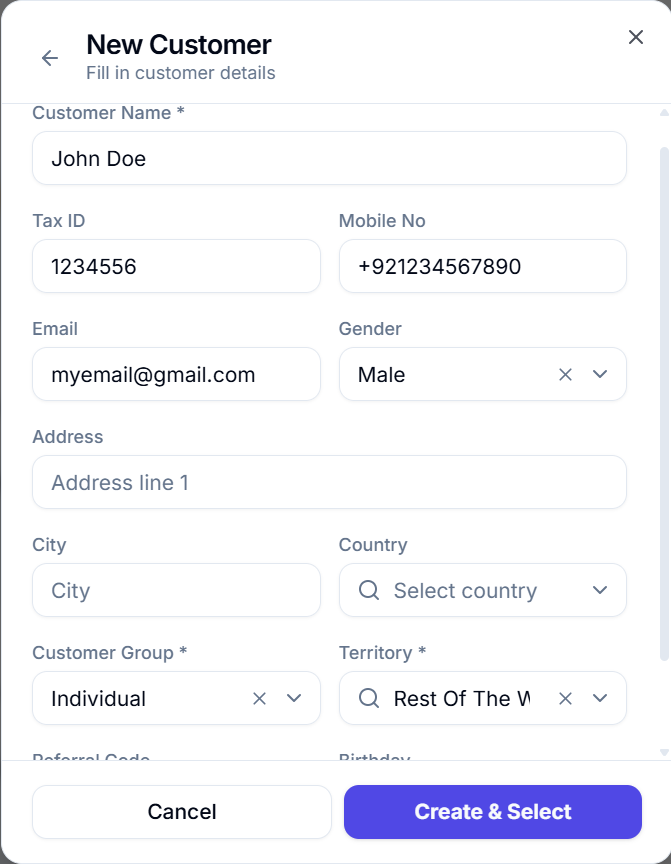
Creating a New Customer
From the Customer Selection dialog, click "Create New" to access the inline customer creation form:
| Field | Required | Description |
|---|---|---|
| Customer Name | Yes | Full name of the customer |
| Tax ID | No | Tax identification number |
| Mobile Number | No | Phone number |
| Email Address | No | Email for receipts |
| Address | No | Street address |
| City | No | City name |
| Country | No | Country (dropdown) |
| Customer Group | Yes | Customer classification group |
| Territory | Yes | Geographic territory |
| Referral Code | No | Referral code for tracking |
| Birthday | No | Date of birth for loyalty programs |
| Gender | No | Gender selection |
Once filled in, click "Create & Select" to create the customer in ERPNext and immediately set them as the active customer for this transaction.
Customer in Return Mode
When the cart is in Return Mode, the customer is locked and cannot be changed. The customer section shows a lock indicator and attempting to click it will show an error toast.
Cart Items
Each item in the cart is displayed as a horizontal card showing all relevant details.
Item Card Layout
Each cart item displays:
- Product Thumbnail — Small image (or package icon fallback)
- Item Name — Primary identifier
- Quantity Controls — Minus (-) and Plus (+) buttons flanking an editable quantity input
- Rate — Editable price (if "Allow Rate Change" is enabled) or read-only display
- UOM Selector — Dropdown to change the unit of measurement (if multiple UOMs available)
- Line Total — Calculated as
Qty × Rate - Discount - Discount — Discount percentage or amount (if enabled)
Editing Quantity
There are several ways to change an item's quantity:
- Plus/Minus Buttons — Click + to increment by 1, - to decrement by 1
- Direct Input — Click the quantity field and type a number
- Arrow Keys — When a qty input is focused, press ↑/↓ to move to the adjacent item's quantity field
- Keyboard — Press the quantity and hit Enter
The quantity input blocks non-numeric characters (e, E, +, -) for data integrity.
Editing Rate
If "Allow Rate Change" is enabled in POS Profile:
- The rate field becomes editable
- Click the rate field to type a new price
- Press Enter or Tab to confirm the change
- The line total recalculates automatically
If rate editing is disabled, the price is shown as formatted read-only text.
Changing Unit of Measurement (UOM)
If an item has multiple UOMs configured:
- A UOM button appears on the cart item
- Click it to reveal a dropdown of available UOMs with their conversion factors
- Selecting a new UOM automatically recalculates the rate based on the conversion factor
- Example: If "Pack" has a conversion factor of 12, and the unit price is $1, the pack price becomes $12
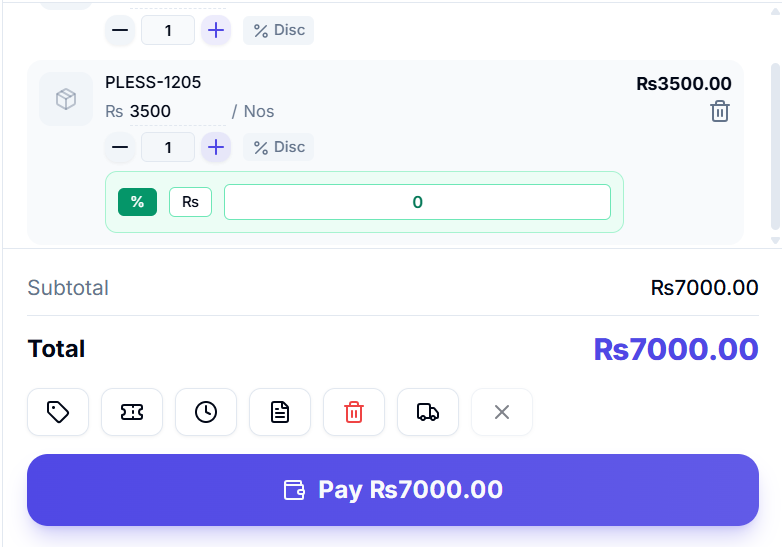
Item-Level Discounts
If "Allow Discount Change" is enabled in POS Profile:
- A discount icon button appears on the cart item
- Click it to expand the discount input panel
- Toggle between Percentage and Amount discount types
- Enter the discount value
- The discount is capped at the Max Discount Percentage Allowed (configured in POS Profile)
- The line total adjusts to show the discounted amount
Item Notes
If "Display Additional Notes" is enabled in POS Profile:
- A notes icon appears on cart items
- Click to expand a text area for adding special instructions or delivery notes
Removing Items
- Delete Key — Press Delete to remove the last item in the cart
- Ctrl + Delete — Clear all items from the cart
- Swipe/click remove — Individual item removal via the cart item interface
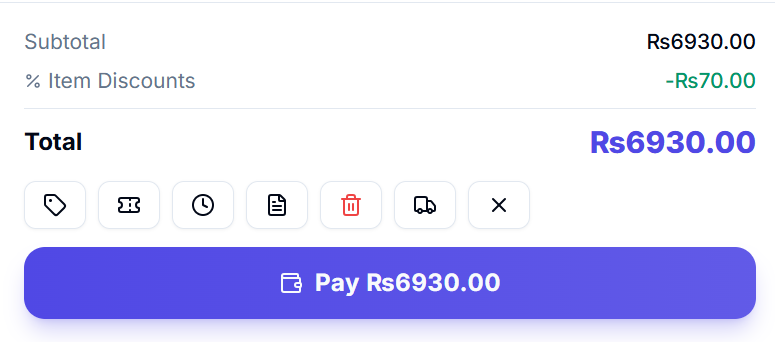
Cart Summary
The Cart Summary section appears at the bottom of the cart and shows the financial breakdown of the current transaction.
Financial Breakdown
The summary displays these line items (when applicable):
| Line | Description | Visibility |
|---|---|---|
| Subtotal | Sum of all item line totals before taxes | Always |
| Item Discounts | Total of all item-level discounts | When any item has a discount |
| Tax Lines | Each tax line with description, rate %, and amount | When taxes apply |
| Offer Item Discount | Discount from promotional offers on items | When offers applied |
| Offer Grand Total Discount | Percentage discount on the total from offers | When offer applies to total |
| Coupon Discount | Discount from applied coupon code | When coupon applied |
| Additional Discount | Manual overall discount (% or amount) | When manually applied |
| Loyalty Redemption | Points redeemed as payment (shown in violet) | When loyalty redeemed |
| Write-Off Amount | Small balance written off (shown in amber) | When write-off applied |
| Delivery Charges | Delivery/shipping fee (shown in blue) | When delivery charge selected |
| Grand Total | Final total after all adjustments | Always |
Applying Additional Discounts
If "Allow User to Edit Additional Discount" is enabled:
- Click the Discount button (tag icon) in the action buttons row
- A discount input panel expands below
- Toggle between Percentage (%) and Amount modes
- Enter the discount value
- Click Apply — the discount is applied to the grand total
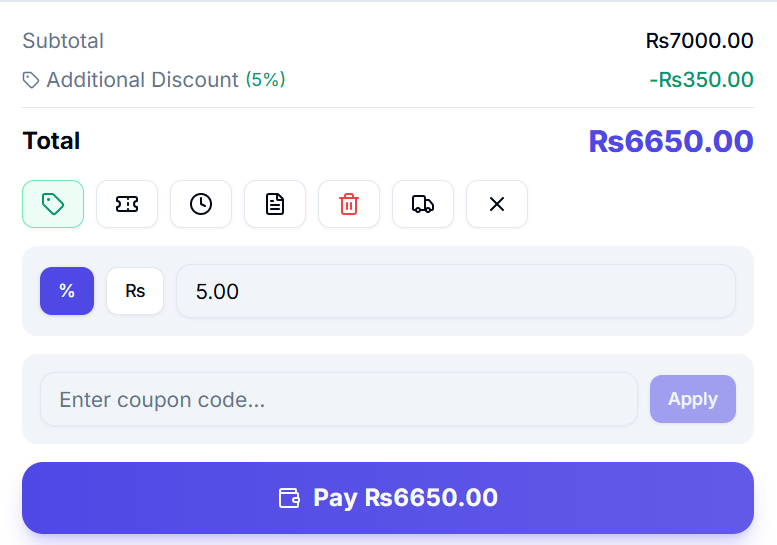
Applying Coupon Codes
If "Auto Fetch Coupons/Gifts" is enabled:
- Click the Coupon button (ticket icon) in the action buttons row
- A coupon code input field expands below
- Enter the coupon code
- Click Apply — the system validates the coupon:
- Checks the coupon exists and is active
- Verifies it hasn't been used up
- Confirms it's within the valid date range
- For Gift Cards: verifies it belongs to the selected customer
- If valid, the coupon discount is applied and shown in the summary
- If invalid, an error message is displayed below the input
Screenshot Hint: Take a screenshot of the coupon code input panel showing a coupon being applied successfully.
Selecting Delivery Charges
If "Use Delivery Charges" is enabled:
- Click the Delivery button (truck icon) in the action buttons row
- A list of available delivery charges expands below
- Each option shows: label, default rate, and actual rate
- Click a delivery charge to select it (click again to deselect)
- The delivery fee is added to the grand total
Delivery charges are not available in Return Mode.
Action Buttons
The cart summary includes a row of action buttons:
| Button | Icon | Description | Condition |
|---|---|---|---|
| Discount | Tag | Toggle additional discount input | "Allow Edit Additional Discount" enabled |
| Coupon | Ticket | Toggle coupon code input | "Auto Fetch Coupons/Gifts" enabled |
| Hold | Pause | Save cart as held/draft invoice | Cart not empty |
| Restore | Clock | Open draft invoices dialog | Always |
| Clear | Trash | Clear all cart items | Cart not empty |
| Delivery | Truck | Toggle delivery charge selection | "Use Delivery Charges" enabled, not return mode |
| Clear Discounts | X-Circle | Remove all discounts, offers, coupons | Any discount applied |
Holding/Parking an Invoice (Draft Invoices)
To save the current cart as a draft for later completion:
- Ensure a customer is selected and the cart is not empty
- Click the Hold button or press Ctrl + H
- The cart data is saved:
- Web mode: Saved via API as a draft invoice on the server
- Electron mode: Saved to the local database
- The cart is cleared for the next transaction
- A success toast confirms the draft was saved
This is useful when a customer steps away or you need to serve another customer first.
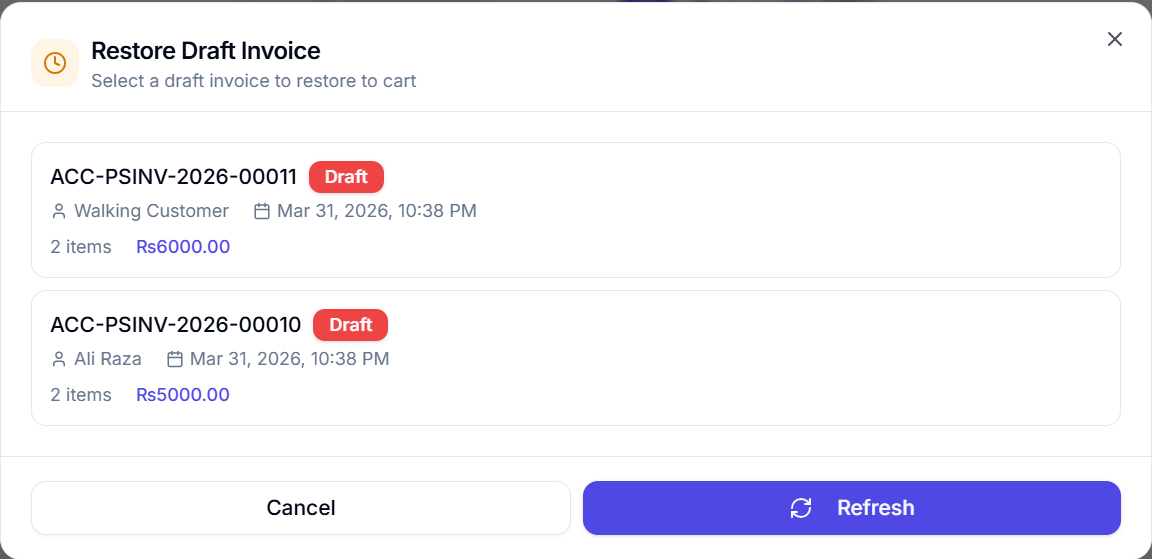
Restoring a Draft Invoice
To load a previously held/parked invoice:
- Click the Restore button or press F8
- The Draft Invoice Dialog opens showing all saved drafts
- Each draft shows:
- Draft name/ID
- Customer name
- Creation date
- Number of items
- Grand total
- Click a draft to restore it into the cart
- The previous cart contents are replaced with the draft
- Optionally, delete unwanted drafts with the delete button
Pay Button
The prominent Pay button at the bottom of the cart summary opens the Payment Dialog. Its label is context-aware:
- "Pay [Amount]" — Normal transaction showing the grand total
- "Return [Amount]" — In return mode, showing the refund amount (in amber)
- "Select Customer" — If no customer is selected (disabled state)
Order Notes
If "Display Additional Notes" is enabled in POS Profile, a text area appears at the bottom of the cart (above the summary) for adding order-level notes. These notes are saved with the invoice as pos_notes.
Applied Offers & Coupons Display
When promotional offers or coupons are applied to the cart, they appear as visual chips/badges in the cart section. Each chip shows:
- The offer/coupon name
- The discount type (percentage or amount)
- A remove button (X) to un-apply the offer/coupon
This gives the cashier clear visibility into what promotions are active for the current transaction.