The Payment Dialog is where transactions are finalized. It handles single payments, split payments, loyalty point redemption, write-offs, and generates the final invoice.
Opening the Payment Dialog
Open the Payment Dialog by:
- Clicking the Pay button in the Cart Summary
- Pressing F4
- Using Command Search (Ctrl + K → "Process Payment")
Payment Dialog Layout
Header Section
- Dialog Title — "Payment" (or "Return Payment" in return mode)
- Customer Name — Shows the selected customer
- Outstanding / Credit Information — If the customer has outstanding balance or available credit, it's displayed here
- Return Badge — An amber "Return" badge appears when processing a refund
Left Panel (Main Content)
Amount Due Card
A large, prominent card showing the total amount due:
- Blue/Primary for normal transactions
- Amber for returns
- Shows the grand total with currency symbol
Subtotal Breakdown
Below the amount due, a collapsible breakdown shows:
- Subtotal
- Tax details (each tax line with rate)
- Active offers and coupon discounts
- Loyalty amount (if applied)
- Write-off amount
Payment Method Selector
A list of available payment methods as selectable buttons. Each method shows:
- Method Icon — Automatic icon selection based on the method name:
- "Cash" → Banknote icon
- "Card", "Credit", "Debit" → Credit Card icon
- "Bank", "Transfer" → Bank/Landmark icon
- "Mobile", "M-Pesa", "Wallet" → Smartphone icon
- "Check", "Cheque" → Document icon
- Other → Dollar Sign icon
- Method Name — e.g., "Cash", "Credit Card"
- Clicking selects the method and highlights it
Navigate between methods using ↑/↓ arrow keys.

Tendered Amount Input
A large numeric input field where you enter the amount paid by the customer.
Quick Amount Buttons — Four preset buttons appear below the input:
- Exact Amount — The rounded grand total
- Next 10 — Rounded up to the next 10 boundary (e.g., $47 → $50)
- Next 50 — Rounded up to the next 50 boundary (e.g., $47 → $50)
- Next 100 — Rounded up to the next 100 boundary (e.g., $47 → $100)
Click any quick amount to instantly fill the tendered amount.

Change / Remaining Amount
- Change Amount (green) — Displayed when the customer pays more than the total:
Tendered - Grand Total - Remaining Amount (red) — Displayed when the customer pays less than the total (for split payments):
Grand Total - Tendered
Right Panel (Desktop Only) — Numpad
A 3×4 grid numpad for touch-friendly amount entry:
[ 7 ] [ 8 ] [ 9 ]
[ 4 ] [ 5 ] [ 6 ]
[ 1 ] [ 2 ] [ 3 ]
[ C ] [ 0 ] [ ⌫ ]
- Number keys (0-9) — Append digit to the tendered amount
- C (Clear) — Reset the tendered amount to 0
- ⌫ (Backspace) — Remove the last digit
The numpad is hidden on screens smaller than the large (lg) breakpoint.
Footer
- Keyboard Hint — Shows "Enter to submit" shortcut
- Cancel — Close the payment dialog without processing
- Save Only — Submit the invoice without printing
- Save & Print — Submit the invoice and open the print preview (primary action)
Split Payments
Split payments allow the customer to pay using multiple payment methods in a single transaction (e.g., part cash, part card).
How to Use Split Payments
- Open the Payment Dialog
- Click "Split Payment" to enable split mode
- Select the first payment method (e.g., Cash)
- Enter the amount for this method
- Click "Add" — the payment is recorded
- Select the second payment method (e.g., Card)
- Enter the remaining amount
- Click "Add"
- Continue until the total paid equals or exceeds the grand total
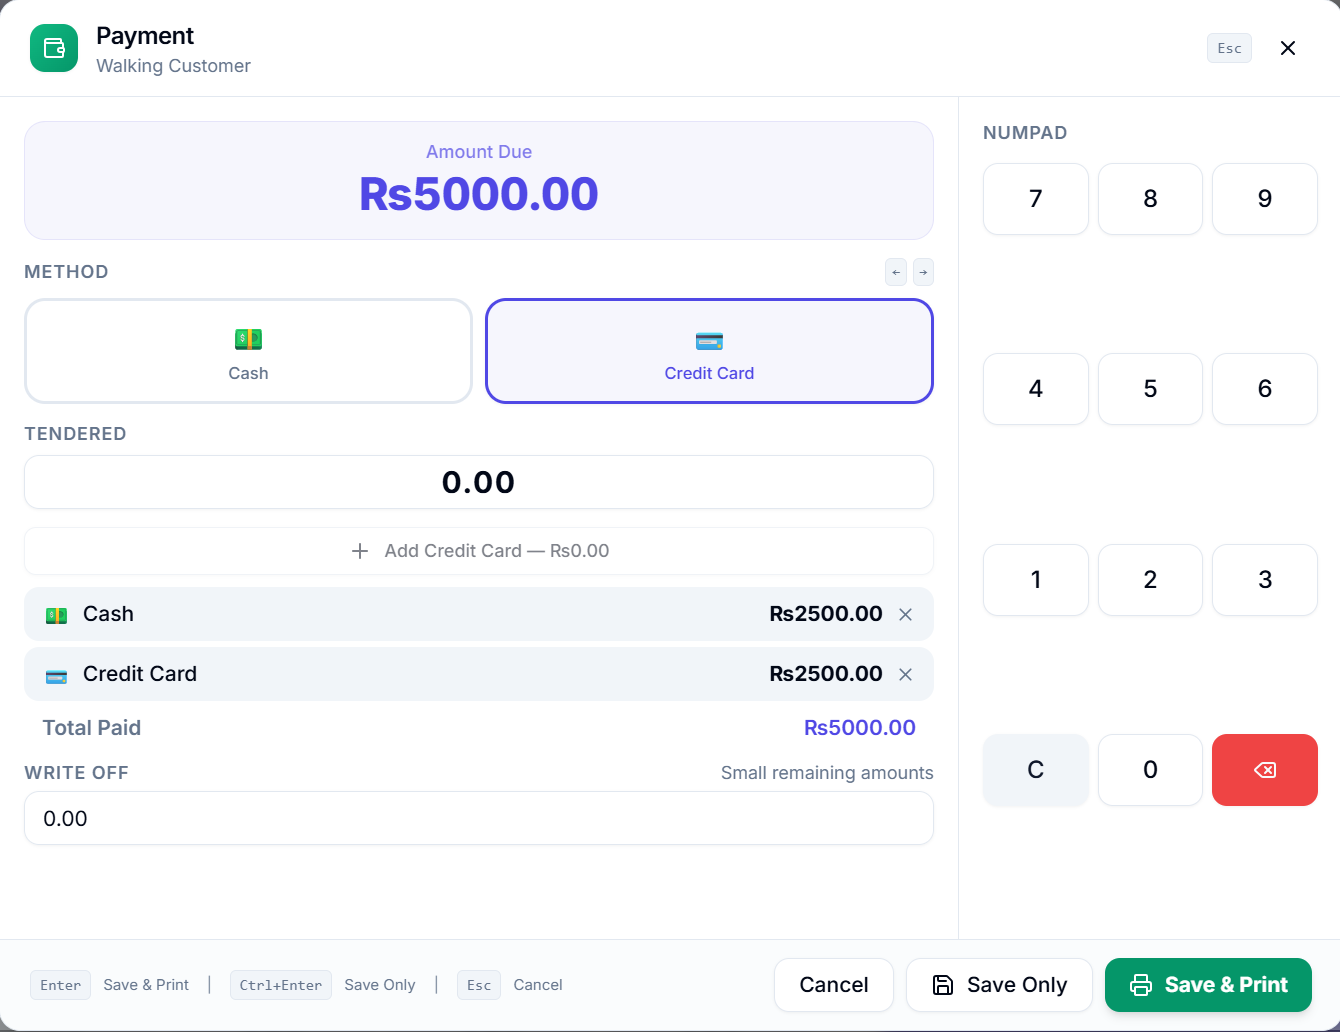
Split Payment Display
When split mode is active:
- A split payments table appears showing each added payment (method + amount)
- Each row has a Remove button to delete that split entry
- The Remaining Amount updates in real-time
- The total of all splits must cover the grand total before submission
Loyalty Points Redemption
If the selected customer is enrolled in a Loyalty Program and has accumulated points, a loyalty redemption section appears in the payment dialog.
How to Redeem Loyalty Points
- The dialog shows the customer's available loyalty points and their monetary value
- Click "Redeem Points" to expand the loyalty input
- Enter the number of points to redeem (minimum 0, maximum is the lesser of available points or the equivalent of the invoice total)
- The system calculates the monetary value:
Points ÷ Conversion Factor = Amount - Click "Apply" to apply the redemption
- The loyalty amount is deducted from the total due
- The loyalty amount appears in violet text in the summary
Loyalty Point Limits
- Points redeemed cannot exceed the customer's available balance
- The monetary value of redeemed points cannot exceed the invoice grand total
- Loyalty redemption is not available in Return Mode
- Points are updated in ERPNext after the invoice is submitted
Write-Off Amount
If "Allow Write Off Change" is enabled in POS Profile, a write-off input appears in the payment dialog.
This is useful for writing off small remaining amounts (e.g., customer pays $49.95 on a $50.00 bill, and you write off the $0.05 difference).
How to use:
- Enter the write-off amount in the input field
- The amount is deducted from the total due
- The write-off is recorded against the configured Write-Off Account and Cost Center
- Write-off is not available in Return Mode
Submitting Payment
Validation Before Submission
Before the invoice can be submitted, the system validates:
For Normal Transactions:
- Cart is not empty
- A customer is selected
- All items have positive quantities
- Payment method is selected (single mode) or split payments cover the total
For Return Transactions:
- Cart is not empty
- A customer is selected
- A "Return Against" invoice is set
- All items have negative quantities
- Grand total is negative
Save Only (Without Print)
Click "Save Only" or press Ctrl + Enter to submit the invoice without printing:
- Invoice data is compiled from the cart, payments, discounts, offers, and loyalty
- Web Mode (Offline) — If offline mode is enabled and the network is unavailable, the invoice is saved to the offline store for later sync
- A success toast shows the invoice name
- The cart is cleared for the next transaction
- The last invoice name is stored for the "Print Last" feature
Save & Print
Click "Save & Print" or press Enter to submit and immediately print:
- Same submission process as "Save Only"
- After successful submission:
- Web Mode — A new browser window opens with the print preview using the configured print format
- The browser print dialog appears automatically
Error Handling & Offline Fallback
If the server is unreachable during submission:
- In offline mode, the invoice is automatically saved to the offline queue
- A toast notification warns that the invoice was saved offline
- The invoice syncs automatically when connectivity is restored
- Without offline mode, an error message is displayed

Printing Receipts
Print After Payment
After "Save & Print", the receipt opens in a new window with the configurable print format (default: "XPOS Thermal Receipt"). The browser's print dialog triggers automatically.
Print Last Receipt
- Click the Print button in the Navbar, or press Ctrl + P
- This reprints the last submitted invoice
- Only visible if "Allow Print Last Invoice" is enabled and there's a recent invoice
Print from Orders
- Navigate to Orders view
- Click an order to view details
- Click the Print button in the order detail modal