The POS Interface
The main POS interface is where cashiers spend most of their time. It's designed for speed and efficiency, with a split-panel layout that shows items on the left and the shopping cart on the right.
Layout Overview
Desktop Layout (Screens wider than 768px)
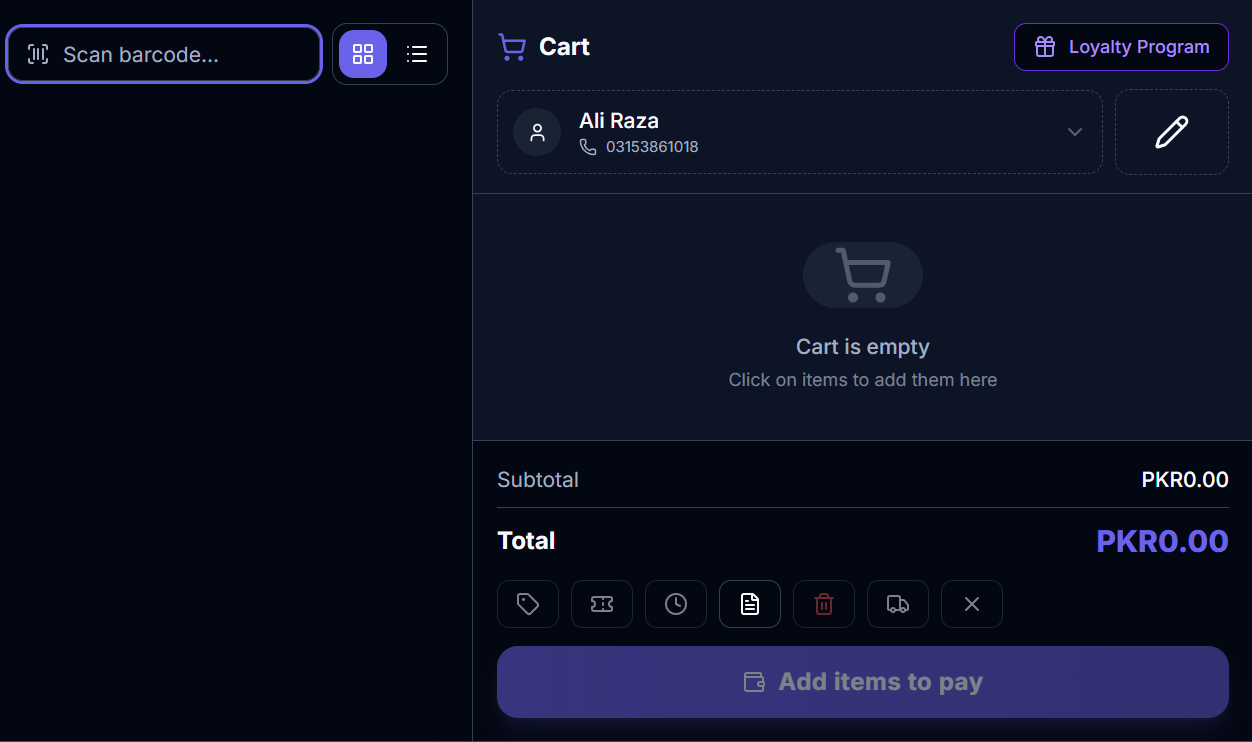
The POS screen is divided into two main panels:
- Left Panel (~70% width) — Item browsing area with search, filters, and item display
- Right Panel (~30% width) — Shopping cart with customer selection, itemized list, and totals
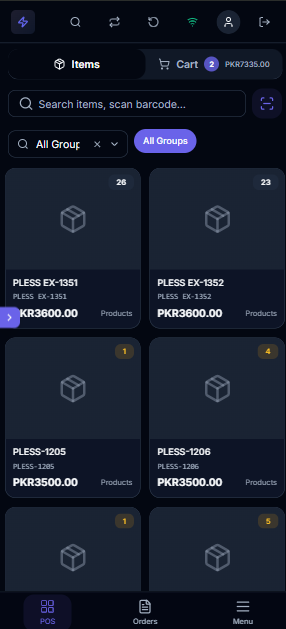
Mobile Layout (Screens narrower than 768px)
On mobile devices, the interface switches to a tabbed layout:
- Items Tab — Full-screen item browsing
- Cart Tab — Full-screen cart view with a total badge indicator
A tab switcher at the top lets you toggle between the two views. The cart tab shows the current grand total as a badge so you can see the running total even while browsing items.
Item Browsing
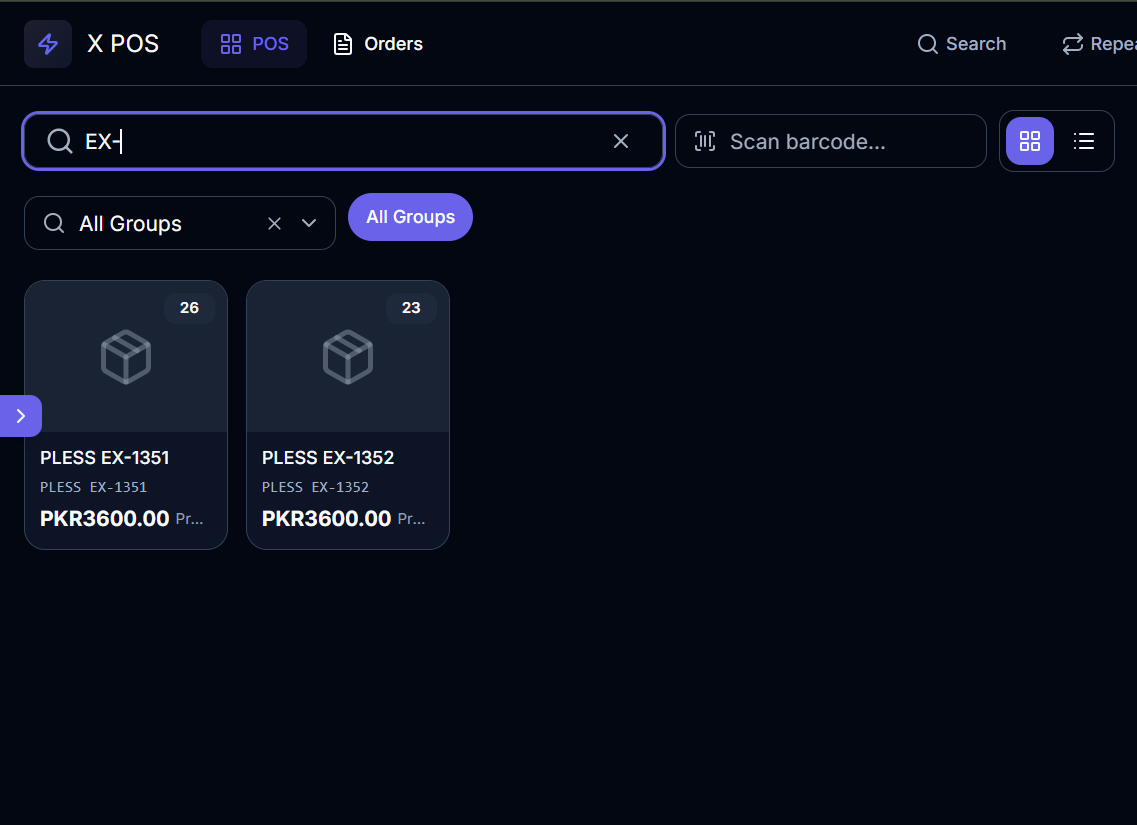
Search Bar
The search bar is located at the top of the items panel. It provides real-time search across item names, item codes, and barcodes.
How to use:
- Click the search bar or press
/(forward slash) to focus it - Type your search term — results update in real-time with a 300ms debounce
- Press Enter to select the first matching item or open item details
- Press Escape to clear the search and blur the input
- Click the X button to clear the search text
The search bar shows a keyboard hint badge /) on desktop to indicate the shortcut.
Barcode Scanner
The barcode scanner input is positioned next to the search bar for hardware barcode scanner support.
How to use:
- Press F2 to focus the barcode scanner input
- Scan a barcode using your hardware scanner — it automatically types and presses Enter
- The input provides visual feedback:
- Green ring flash — Item found and added successfully
- Red ring flash — Item not found or error
- Paste a barcode value — it auto-processes after 50ms
When a barcode is scanned:
- The system searches for the item by barcode
- If found, the item is added to the cart automatically
- If not found, an error flash is shown and the barcode text is selected for re-scanning
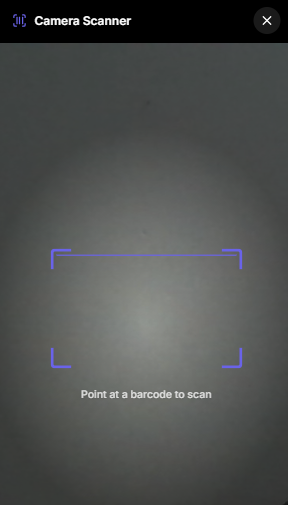
Camera Barcode Scanner (Mobile)
On mobile devices, a camera icon button opens the device camera for barcode scanning:
- Tap the camera barcode button
- Point your device camera at the barcode
- The barcode is automatically detected and processed
- The item is added to the cart if found
Command Search (Ctrl + K)
The Command Search is a powerful quick-access dialog that combines item search, navigation, calculator, and quick actions in one place. Press **Ctrl + K** (or Cmd + K on Mac) to open it.
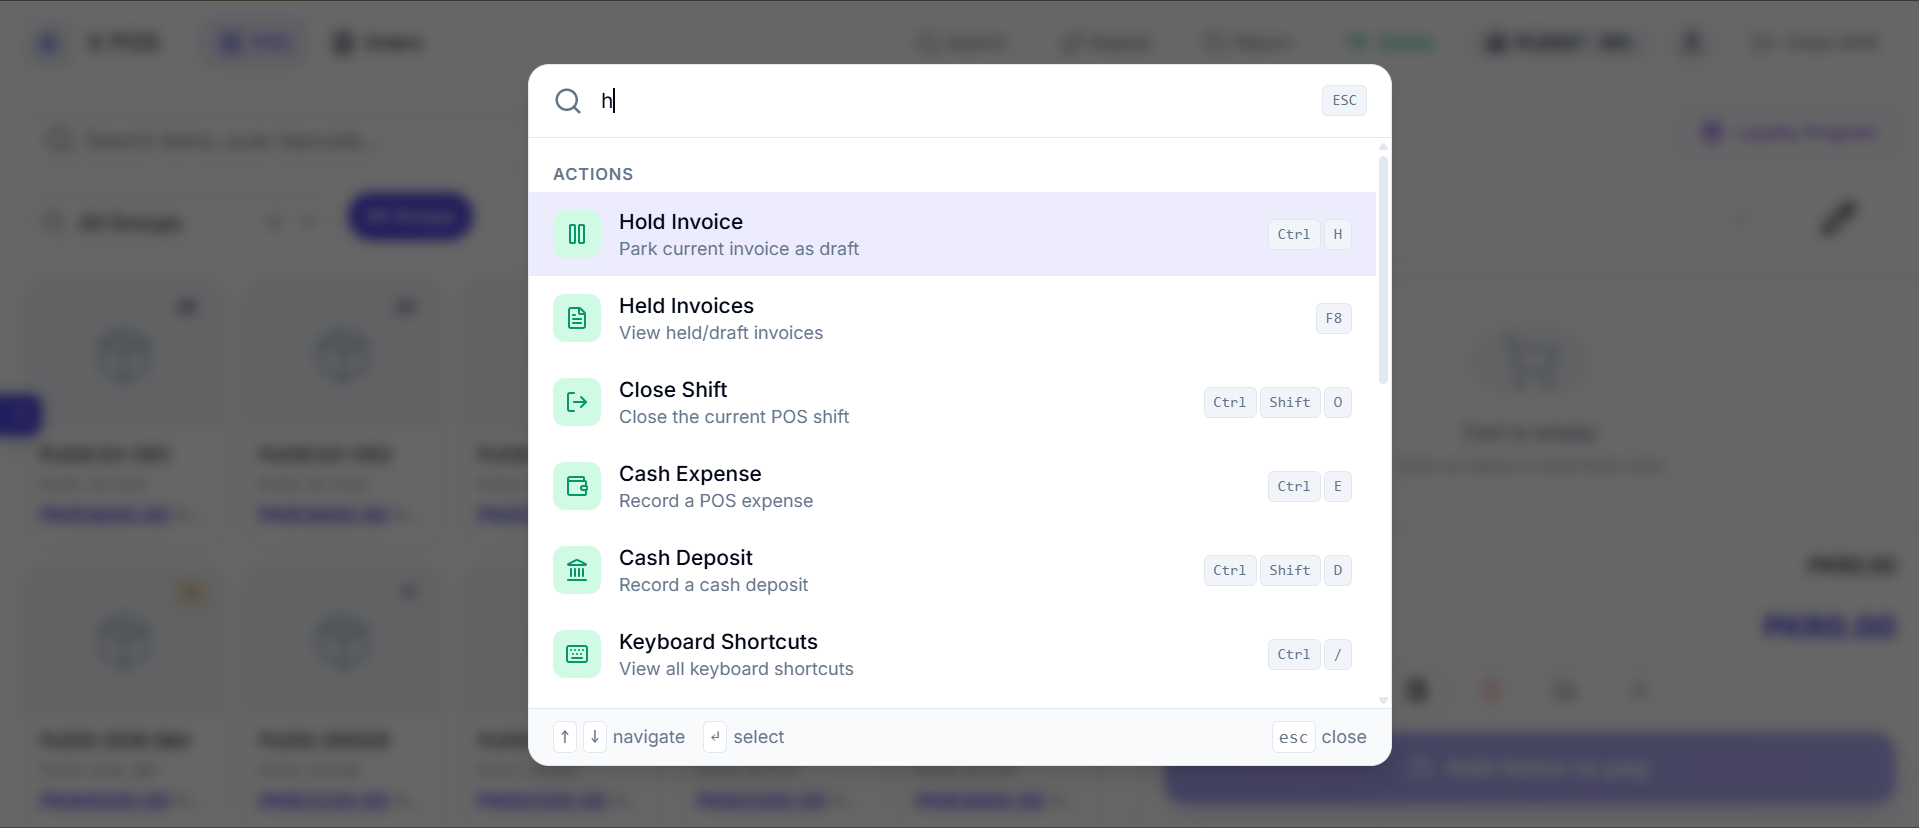
The Command Search provides five types of results:
Calculator
Type = followed by a math expression (e.g., = 25 * 4 + 10). The result is calculated instantly and displayed.
Quick Actions
These are shortcuts to common POS operations:
| Command | Action |
|---|---|
| New Sale | Clear cart and start fresh (Ctrl + N) |
| Process Payment | Open payment dialog (F4) |
| Select Customer | Open customer selection (F6) |
| Hold Invoice | Save current cart as draft (Ctrl + H) |
| Restore Draft | Open held/draft invoices (F8) |
| Repeat Invoice | Repeat a past invoice (Ctrl + G) |
| Return Invoice | Start return process (Ctrl + R) |
| Print Last | Print last receipt (Ctrl + P) |
| Apply Discount | Open discount input (Ctrl + D) |
| Close Shift | Open closing dialog (Ctrl + Shift + O) |
| Cash Expense | Record a cash expense (Ctrl + E) |
| Cash Deposit | Record a bank drop (Ctrl + Shift + D) |
| Toggle View | Switch grid/list (F5) |
Page Navigation
Type the name of a page to navigate there: POS, Orders, Purchase Order, Purchase Invoice, Stock Receiving, Expenses, Bank Drops, Barcode Printer, Settings.
Item Search
Type any text to search for items by name, code, or group. Results show the item name, code, price, and stock information.
Help
Type ? to see available command syntax and shortcuts.
Keyboard Navigation in Command Search:
- ↑/↓ arrows — Navigate through results
- Enter — Execute the selected result
- Escape — Close the dialog
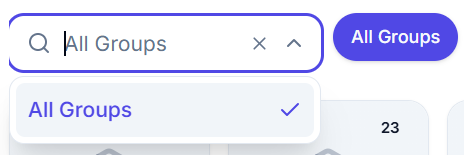
Item Group Filter
Below the search bar, you can filter items by Item Group:
- Quick Group Buttons — The top 12 most popular item groups appear as clickable buttons for one-tap filtering
- Autocomplete Dropdown — For groups not shown in the quick buttons, use the autocomplete dropdown to search and select any item group
- Click a group button again to deselect it and show all items
Item Display Modes
X POS supports two display modes for the item catalog, toggled with F5 or the view mode button:
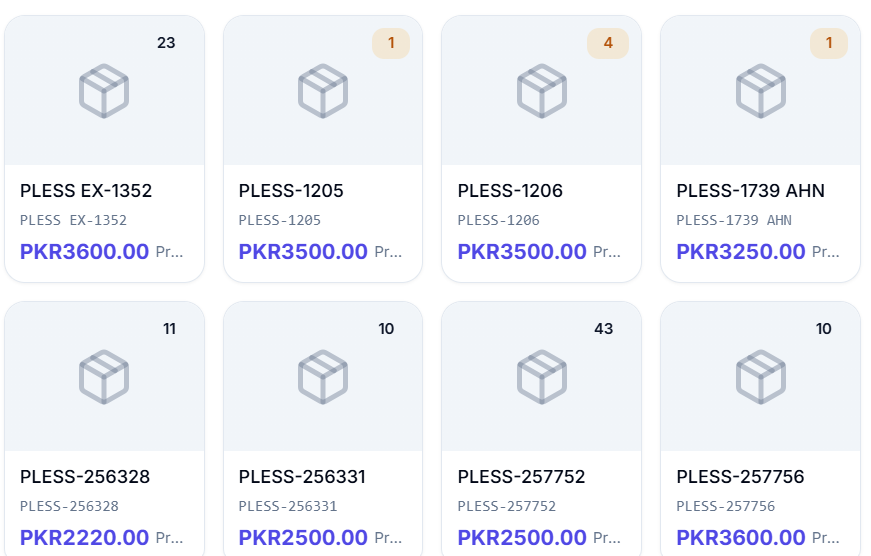
Grid View (Card View)
Items are displayed as image cards in a responsive grid:
- 2 columns on mobile
- 3 columns on tablet
- 4 columns on laptop
- 5 columns on wide screens
Each item card shows:
- Product Image — With hover zoom effect. Falls back to a package icon if no image is available
- Stock Badge — (Top-right corner) Shows current stock quantity with color coding:
- 🟢 Green — In stock
- 🟡 Yellow/Amber — Low stock
- 🔴 Red — Out of stock
- Out-of-Stock Overlay — Greyed out with an alert circle when stock is zero (and negative stock is not allowed)
- Hover Action Buttons — Plus icon to add to cart, Info icon to view details
- Item Name — Truncated to 2 lines
- Item Code — Shown if "Display Item Code" is enabled (monospace font)
- Price — Formatted with currency symbol
- Item Group — Shown in muted text
List View
Items are displayed as compact horizontal rows:
- Thumbnail — Small 14×14px image on the left
- Item Name — Primary text
- Item Code + Group — Secondary text in muted color
- Stock Badge — With tooltip for exact quantity
- Price — Bold text aligned right
- Detail Button — Info icon
- Add Button — Plus icon (or Ban icon if out of stock)
Infinite Scroll
Both views support infinite scrolling:
- Items load in pages (default 20 per page, configurable via "Item Search Limit")
- As you scroll to the bottom, the next page loads automatically
- A loading spinner appears during pagination
- Skeleton placeholders show during initial loading (12 skeleton cards in grid mode, 8 skeleton rows in list mode)
Adding Items to Cart
There are multiple ways to add items to the shopping cart:
Click/Tap on Item
Click any item card or list row. The item is added to the cart with quantity 1. If the item is already in the cart, its quantity is incremented by 1.
Barcode Scan
Scan a barcode using the hardware scanner or camera. The item matching the barcode is automatically added.
Command Search
Open Command Search (Ctrl + K), search for an item, and press Enter to add it.
Keyboard Navigation
Use ↑/↓ arrow keys to highlight items, then press Enter to add the highlighted item.
Before Adding an Item
Depending on your POS Profile settings, the following checks and prompts may occur:
Customer Validation
If no customer is selected, you'll be prompted to select a customer first (depending on configuration).
Variant Selection
If the item is a template item with variants (e.g., T-Shirt → Size: S/M/L, Color: Red/Blue), a variant picker dialog appears to select the specific variant.
Quantity Input
If "Input Qty" is enabled in POS Profile, a quantity input dialog appears before adding the item, allowing you to enter the desired quantity upfront.
Stock Validation
If "Block Sale Beyond Available Qty" is enabled:
- The system checks if sufficient stock is available
- If the item is out of stock, clicking it is blocked and the card appears greyed out
- If adding would exceed available stock, an error message is shown
Tax Template Lookup
When an item is added, the system automatically looks up and caches the applicable Item Tax Template for accurate tax calculation.
Auto Offer Application
If "Auto Fetch Coupons/Gifts" is enabled, the system automatically evaluates and applies eligible promotional offers after each item addition.
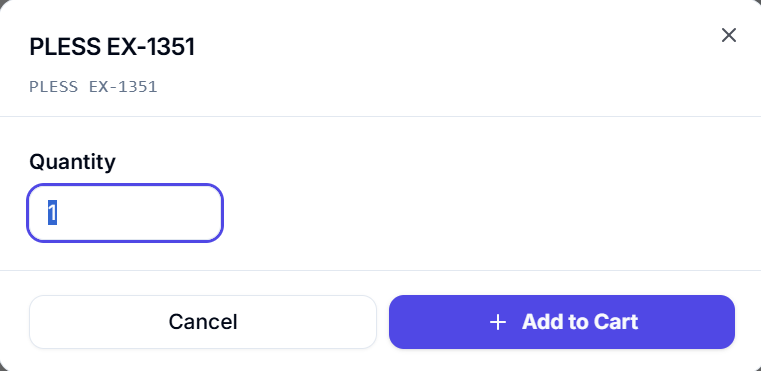
Item Detail Dialog
Click the Info (ℹ) button on any item card or list row to open the Item Detail Dialog. This dialog provides additional options before adding the item to the cart.
Unit of Measurement (UOM) Selection
If the item has multiple UOMs configured (e.g., Piece, Pack, Box, Carton):
- UOM button grid is displayed with each available unit
- Selecting a UOM automatically adjusts the price based on the conversion factor
- The selected UOM is highlighted
Batch Selection
For batch-tracked items:
- A scrollable list of available batches is shown
- Each batch displays: Batch Number, Expiry Date, Available Quantity
- Click a batch to select it
- If "Auto Set Batch" is enabled, the first available batch is pre-selected
Serial Number Selection
For serialized items:
- A search input allows filtering serial numbers
- A checklist of available serial numbers is displayed
- Check/uncheck serial numbers to select them
- The selected serial count automatically syncs with the quantity field
Quantity Input
A numeric input field with:
- Minimum value of 1
- No decimal places (whole numbers only)
- Used to set the quantity before adding to cart
Adding from Detail Dialog
Click "Add to Cart" to add the item with the selected UOM, batch, serial numbers, and quantity. The button is disabled until all required selections are made (batch required for batch-tracked items, serial numbers required for serialized items).